
How Deep Should Isopod Substrate Be? Depth Guide for Healthy Colonies
Ask five isopod keepers how deep they fill their enclosures and you will get five different answers. It matters because substrate is not just bedding — your isopods eat it, burrow in it, moult in it, and raise their babies in it. Get the depth wrong and the moisture system that keeps your colony alive fails.
So, how deep should isopod substrate be? For most species, 5–8 cm (2–3 inches) is the sweet spot. Surface-dwellers like Powder Blues get by on 4–5 cm, while deep burrowers such as Cubaris want 8–10 cm. Here is how to pick the right depth — and when deeper becomes a problem.
Why Substrate Depth Matters
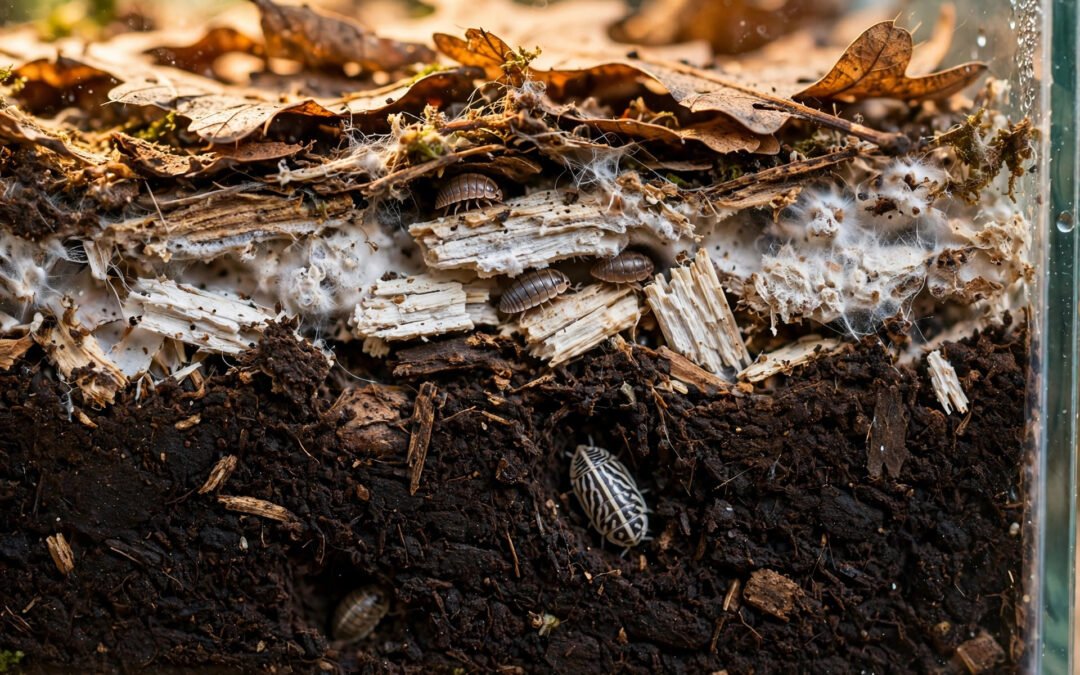
A good substrate does five jobs at once: it holds the moisture gradient, feeds the colony (the detritus and microbes in it are the main course), provides burrows and moulting chambers, buffers temperature swings, and hosts microbes that outcompete pathogens — and depth makes all five possible. A thin layer cannot hold a vertical moisture gradient: water wicks straight through, so everything is either damp or dry. A deep-enough layer lets the surface dry between mistings while the lower layers stay humid, giving isopods the choice they need, and gives gravid females and freshly moulted pods a digging place.
How Deep Should Isopod Substrate Be? The Depth Chart by Species Type
Different genera use substrate very differently:
| Species | Depth | Why |
|---|---|---|
| Surface-dwellers (Powder Blue / Powder Orange, Dwarf Whites) | 4–5 cm (1.5–2 in) | Rarely dig; they forage on top. |
| Standard roamers (Dairy Cow, Zebra, A. vulgare, P. scaber, Cubaris murina) | 5–8 cm (2–3 in) | Burrow, graze, and moult throughout the layer. |
| Deep burrowers (Cubaris: Rubber Ducky, Panda King, Cappuccino) | 8–10 cm (3–4 in) | Obligate burrowers, mostly underground. |
The popular species in our beginner isopod guides all fall in the 5–8 cm column. The “2-inch bare minimum” from old forums is overrated — it is a survival floor, not a target.
The One-Quarter Rule: Size Depth to Your Tub
Here is the rule most keepers never hear: substrate depth should be roughly one-quarter of the tub’s total height. It scales automatically, and it protects the real-world constraint — headroom.
You need clear space between the substrate surface and the lid for airflow, feeding access, and escape prevention. Fill a tub to the brim and substrate presses against the ventilation holes, keeping the lid zone soggy and giving climbers a foothold toward the holes. The Nebraska Game and Parks isopod care guide flags exactly this. For the full tub-sizing logic, see our isopod enclosure size guide.
Can Isopod Substrate Be Too Deep? Yes — Watch for These Signs
The top-ranking guides all give you a minimum. None warn you about the maximum — and there is one. Deep substrate holds water for a long time, so in a poorly ventilated tub with a heavy mister, the bottom layer never dries, oxygen stops reaching it, and anaerobic bacteria take over. The result is a compacted black layer that smells sour or rotten — the nursery zone turned toxic, and it can take a colony with it.
Signs your substrate is too deep for your setup:
- A sour, swampy, or rotten-egg smell when you lift a hide
- The bottom substrate looks black and compacted instead of crumbly
- Water pools at the bottom or the floor stays visibly wet for days
- Fungus gnats appearing in numbers despite a clean surface
The fix is almost never “remove substrate” — it is drainage and airflow. A thin drainage layer (a centimetre of horticultural charcoal or coarse bark) under deep setups, lighter misting, and better cross-ventilation solve it. If your deep tub smells sour, depth is not the disease — poor drying is.
How Depth Changes Your Moisture Gradient
The moisture gradient — one damp side, one drier side — is the single most important concept in isopod care, and depth makes it forgiving. In a thin layer, one missed misting collapses the whole gradient; in 5–8 cm, the surface can dry while the lower half stays humid, so your colony keeps a damp retreat even if you are a day late.
Technique matters too: water the damp end by pouring into a corner so moisture wicks downward — misting only wets the top centimetre, while pouring reaches the depths burrowers actually live in. Full walkthrough in our isopod humidity control guide.
One behaviour test worth adopting: if burrowers like Cubaris suddenly stop digging and cluster on the surface, do not add more substrate — check the lower-layer moisture. Something below has gone wrong (usually too wet or compacted), and they are voting with their feet. More on reading Cubaris in our Cubaris murina care guide.
How to Measure and Set the Right Depth
Forget precision instruments. Press your finger into the substrate to the second knuckle — roughly 4–5 cm, and it doubles as a moisture check. A cheap ruler works for the first fill; some keepers draw a fill line on the outside of clear tubs, which makes topping up effortless later.
Fill the base layers dry, moisten the damp end, then cap with 2–3 cm of leaf litter on top. The litter counts as habitat, not base depth — the 5–8 cm figure refers to the soil-and-wood layer beneath it. For what the mix itself should contain, see our best substrate mix for isopods recipe.
Topping Up vs Replacing: Keeping Depth Over Time
Substrate compacts — an 8 cm fill settles toward 6 within months — and the colony steadily eats the leaf litter and rotten wood out of it. The rookie move is a full teardown; the experienced move is topping up. Every 2–3 months, add fresh leaf litter on top and tuck crumbled rotten wood into the upper half of the base. Only do a full replacement for mite outbreaks, unfixable mould, or contamination: a mature substrate’s microbial community is worth more than fresh soil.
5 Substrate Depth Mistakes Beginners Make
- Filling the tub to the brim. No headroom means no airflow and substrate pressed against the vents. The one-quarter rule exists for this.
- Going shallow to save substrate. Thin substrate kills your moisture gradient. Bagged substrate is cheap; colony restarts are not.
- Same depth for every species. Cubaris crammed into 4 cm of soil will decline slowly. Match depth to the genus.
- Piling on depth instead of fixing moisture. More soil in a soggy tub is just a deeper soggy tub. Fix ventilation and misting first.
- Replacing instead of topping up. A full swap throws away months of microbial maturity. Refresh the consumables, keep the foundation.
References
- PostPods, “Isopod Substrate: The Complete UK Guide” — layered substrate recipe and species-specific depth ranges.
- Tye-Dyed Iguana, “The Complete Guide to Keeping Pet Isopods” — substrate depth guidance (2–4 inches minimum, deeper for cave-dwelling species).
- Nebraska Game and Parks, “The Care and Keeping of Isopods” — minimum 3-inch substrate depth and keeping substrate clear of ventilation holes.
Species vary — cross-check against the exact species or morph you keep. When in doubt, the deeper end of the range is the safer error.