
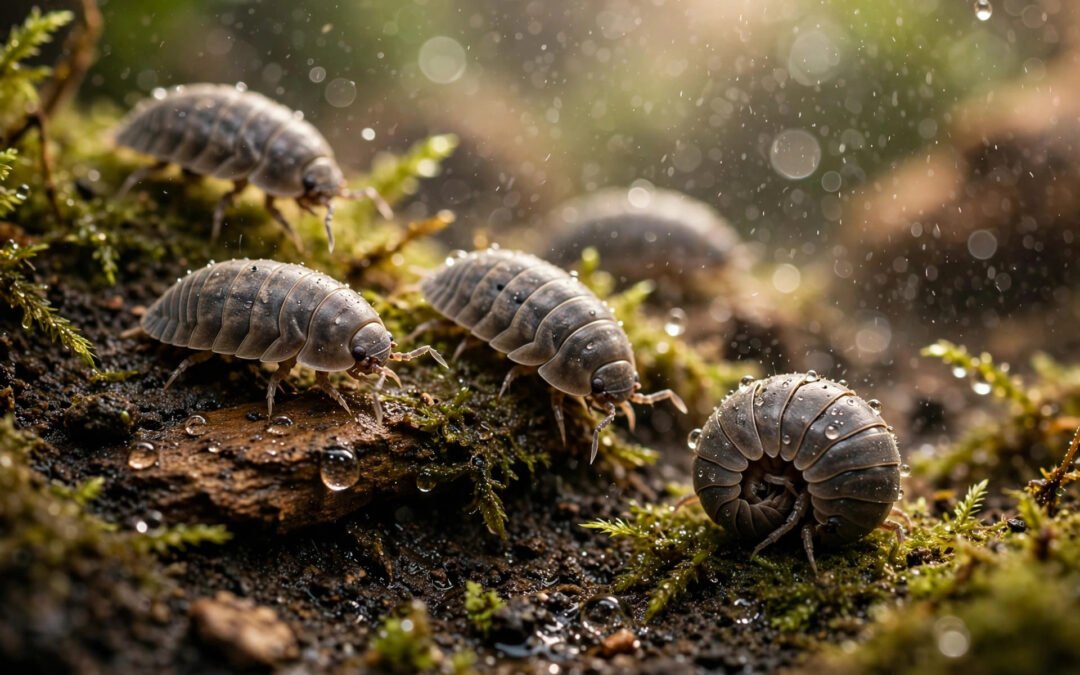
Why Humidity Matters So Much in Isopod Keeping
Among enclosure variables, humidity is one of the most influential for many commonly kept species — getting it right supports feeding, molting, and breeding, though ideal levels vary by species. Isopods are terrestrial crustaceans — they breathe through gill-like structures called pleopods on their undersides, and research shows these pleopods must stay moist to function efficiently in air that isn’t fully saturated [1]. In prolonged dry conditions, isopods are at risk of desiccation, which can be fatal — sensitive, moisture-dependent species may decline within days, while hardier species can often ride out short dry spells by sheltering in damp microclimates. Notably, species differ markedly in dry tolerance: the families Oniscidae, Porcellionidae and Armadillidiidae are found in progressively drier habitats, with increasing respiratory specialization [1]. That said, too much moisture can encourage the opposite problems: soggy substrate, mold blooms, and mite outbreaks.
Getting humidity right sounds technical, but in practice it comes down to two skills: knowing how to measure it, and knowing how to nudge it up or down. Once you can do both, nearly every other part of isopod care becomes easier.
What Humidity Level Do Isopods Actually Need?
There is no single “correct” number for every isopod, but almost all species popular in the hobby do best when the substrate stays consistently damp and the air feels humid. Here are the ranges keepers generally aim for as rules of thumb — treat them as starting points, not prescriptions, and observe your animals:
- Most temperate species (Armadillidium vulgare, Armadillidium maculatum, Porcellio scaber): around 60–80% relative humidity, with damp substrate.
- Tropical and moisture-loving species (Porcellio laevis, Cubaris species): around 75–90%, with one end of the enclosure kept clearly moist.
- Desert-edge species (some Porcellio and Hemilepistus): around 40–60%, but still with a moist retreat — even desert isopods should always have access to somewhere damp to rehydrate.
Species exception worth knowing: Porcellionides pruinosus (Powder Orange/Blue) has a waxy exoskeleton coating that helps prevent dehydration, so it tolerates considerably drier setups than most tropical species — it is a poor fit for the 75–90% bracket [3].
The key insight is the moisture gradient. Rather than trying to make the entire enclosure one uniform humidity, set it up so one end is moist and the other is drier. Isopods will move around and choose the spot they prefer at any moment — they physically move between wetter and drier zones to manage hydration [3]. A gradient gives the animals room to self-regulate, which forgives a lot of beginner mistakes. You can learn more about setting up that kind of enclosure in our isopod enclosure setup guide.
How to Measure Humidity in an Isopod Enclosure
The digital hygrometer method
The easiest and most reliable way to measure humidity is a small digital hygrometer — the same kind sold for reptile enclosures. Place it on the substrate in the middle of the tub, not directly under the water dish or against the wettest corner, and give it an hour to settle before trusting the reading. Cheap hygrometers can be off by 5–10%, so if you want accuracy, buy two from different brands and compare.
The touch test (no equipment needed)
Long-time keepers rely heavily on the touch test. Squeeze a handful of substrate firmly:
- If water drips out, it is too wet.
- If it holds its shape like a damp sponge and no water squeezes out, it is about right.
- If it crumbles apart immediately, it is too dry.
The touch test won’t give you a number, but it tells you what actually matters: whether the isopods’ breathing structures have enough moisture. Many beginners mist lightly and assume everything is fine because the air “feels humid” — but dry substrate with humid air can still lead to colony losses over time.
Watching the animals
Isopods themselves are humidity meters. Often, when the enclosure is too dry, they cluster tightly under bark or in the moistest corner and barely move. When it is too wet, they may climb the walls, crowd the lid, or avoid the substrate entirely. A healthy colony with suitable humidity spreads out and forages across the whole enclosure. That last signal — whether isopods are hiding or dying — is worth reading about in detail in our guide on isopod molting vs dying, since humidity problems are a commonly reported contributor to failed molts.
How to Raise Humidity
If your readings or the touch test show things are too dry, work through these steps in order:
- Pour, don’t mist. Misting wets the surface, which evaporates within hours. Pouring water directly into one end of the substrate recharges the deep moisture reservoir. Add a cup or two of dechlorinated water to the moist end, let it soak through, and check the squeeze test again.
- Reduce ventilation temporarily. Cover part of the lid’s ventilation holes with tape or cling film for a day or two. Less airflow means less moisture escaping. Watch that you don’t seal it completely — stagnant air encourages mold.
- Add a deeper moisture reservoir. A layer of damp sphagnum moss in the moist corner holds water far longer than bare substrate. When the moss starts to feel dry on top, it is time to re-wet.
- Check your substrate depth. Thin substrate dries out fast. Two to three inches of proper isopod substrate mix buffers humidity dramatically better than a shallow layer, because the lower inches stay damp long after the surface dries.
A common mistake is misting several times a day while the substrate stays bone dry underneath. That pattern gives you humid air and struggling isopods. Deep, even moisture beats frequent surface misting every time.
How to Lower Humidity
Too much moisture can be just as harmful. Overly wet enclosures encourage mold, attract grain mites, and may contribute to exoskeleton and molting problems. Here’s how to bring it down:
- Increase ventilation. Open up more lid holes or switch to a mesh-lidded container. Airflow is the fastest humidity lever you have.
- Stop watering the dry end. Keep all added water to the moist corner only, and skip a watering cycle entirely. The enclosure will often stabilize within a day or two.
- Add dry leaf litter on top. A thick layer of dry leaves absorbs surface moisture and gives isopods dry ground to stand on while the lower substrate stays damp.
- Absorb excess with dry substrate. Mix a handful of dry substrate into the soggiest spots. If water pools anywhere when you press the substrate, it is far too wet — pour or scoop it out.
If mold has already taken hold from chronic over-wetting, read our guide on mold and mites in isopod enclosures before it spreads.
Seasonal Humidity: Summer, Winter, and Indoor Heating
Humidity control isn’t a set-it-and-forget-it job, because your room changes around the enclosure. Winter indoor heating can drop room humidity below 30%, and a ventilated tub will lose moisture much faster in January than in July. Conversely, a humid summer room can push an already-moist enclosure into swamp territory.
Build a simple habit: check the squeeze test once a week in summer, twice a week in winter. Keep a small notebook or phone note of what you did and when — patterns emerge quickly, and within a month you will know your enclosure’s rhythm. Many keepers find they only need to add water once or twice a week once the substrate depth and ventilation are dialed in.
Putting It All Together
Healthy isopod humidity control really comes down to four habits: measure it (a hygrometer plus the squeeze test), set up a gradient so the animals can choose, recharge deep moisture by pouring rather than misting, and adjust ventilation before anything else when numbers drift. For most keepers, these four habits turn humidity from the scariest variable into one of the easiest parts of the routine. A colony whose moisture needs are met is more likely to show the results: steady breeding, successful molts, and isopods out foraging instead of huddled in a corner.
References
- Smigel, J.T. & Gibbs, A.G. (2008). Conglobation in the pill bug, Armadillidium vulgare, as a water conservation mechanism. Journal of Insect Science 8:44. https://gibbs.faculty.unlv.edu/Pill%20Bug%202008.pdf
- Nebraska Game and Parks Commission — “The Care and Keeping of Isopods.” https://magazine.outdoornebraska.gov/blogs/nebraska-nature/the-care-and-keeping-of-isopods/
- Tye-Dyed Iguana — “The Complete Guide to Keeping Pet Isopods: Species, Setup, and Breeding.” https://thetyedyediguana.com/blog/the-complete-guide-to-keeping-pet-isopods-species-setup-and-breeding/
- Crawler Island — “Isopod Care Basics.” https://www.crawlerisland.ca/api/care-guides/isopod-care-basics/pdf
Related Reading
Rubber Ducky isopods need consistently high humidity with good ventilation. Panda King isopods want high humidity balanced with airflow — see the Panda King isopod care guide. Clown isopods do best with a humid hide on one side of the enclosure.
Humidity starts with the right substrate mix for isopods. See common isopod keeping mistakes — over-misting is mistake #1. Full setup walkthrough: beginner isopod care guide.
Trackbacks/Pingbacks