Starting your first isopod colony is one of the easiest ways into the hobby — and also one of the easiest ways to feel lost in conflicting advice. This isopod beginner FAQ answers the 20 questions new keepers ask most, with honest, experience-based answers rather than generic care-sheet filler. Each answer also points you to our deeper guides when you want the full picture. Whether you’re buying your first culture this week or just exploring the hobby, this isopod beginner FAQ will take you from zero to a thriving colony.
1. What exactly is an isopod?
An isopod is a small crustacean — a relative of crabs, shrimp, and lobsters — not an insect. Terrestrial isopods (the order Isopoda) breathe through gill-like structures under their belly, which is why they need damp surroundings: their gills must stay moist to take up oxygen. They have 14 legs, a segmented shell, and roughly 10,000 described species, from common garden pillbugs to the giant deep-sea isopod. When beginners say “isopods,” they almost always mean the land-dwelling species we keep as pets and cleanup crews.
2. What is the best isopod species for a complete beginner?
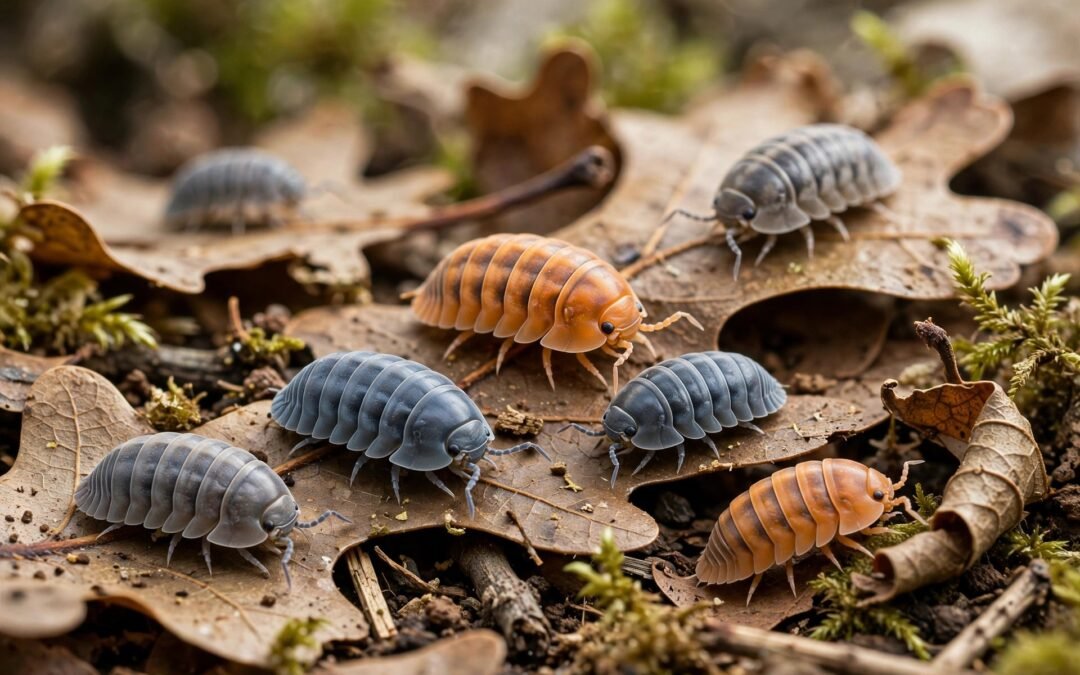
For a first colony, the Powder Orange (Porcellionides pruinosus) is the safest bet: hardy, active, visible during the day, tolerant of humidity swings, and fast to breed. Dairy Cows (P. laevis) are equally forgiving and grow impressively large. If you want a full ranking with honest trade-offs, read our best isopod species for beginners guide — it is the species-picking companion to this isopod beginner FAQ. One opinion from experience: avoid Dwarf Whites as your first species — they reproduce explosively (parthenogenically, without males) and can fill a tub faster than you learn colony management.
3. How many isopods should I start with?
A standard starter culture of 10–15 isopods is enough to establish a healthy colony. That number gives you good odds of having both males and females, and the colony reaches self-sustaining numbers faster than a tiny group of five. If you buy two cultures, keep them separate for a few weeks first — quarantining new arrivals before mixing them with existing stock is one of those habits that seems fussy until the first time it saves you from a mite outbreak.
4. Isopod beginner FAQ: what does a first setup need?
Your day-one kit is shorter than most isopod beginner FAQ guides suggest: a ventilated plastic tub with a lid, 5–8 cm of moist substrate, a thick layer of leaf litter, a few pieces of rotting wood or cork bark, and a calcium source like cuttlebone. That is genuinely it. When the pods arrive, float the shipping cup in the tub for 20–30 minutes to equalize temperature, gently tip them onto the leaf litter, mist only one side of the enclosure, and then leave them alone for a few days. Full walkthrough here: isopod enclosure setup.
5. What do isopods eat?
Isopods are detritivores: their natural diet is decaying plant matter. The foundation of feeding is permanent leaf litter and rotting wood already in the substrate — most of their actual nutrition comes from there, not from what you hand-feed. On top of that, offer fresh vegetables twice a week, an occasional protein source, and keep calcium available at all times. The full breakdown is in our isopod feeding guide.
6. How often should I feed my isopods?
Fresh food twice a week is plenty for a typical starter colony — more than that and you are feeding mold, not isopods. Remove uneaten vegetables within 24–48 hours; a slice of zucchini left to rot becomes a fruit-fly nursery. A useful rule: if the leaf litter is disappearing steadily and the colony is active, they are not hungry — fresh food is a supplement, not the main course. See our safe vegetables list and protein feeding schedule for the details.
7. Isopod beginner FAQ: how often should I mist?
Mist one side of the enclosure every 1–3 days, depending on your climate and ventilation — never the whole tub at once. The goal is a moisture gradient: one damp end where pods go to rehydrate their gills, one drier end where they retreat when it gets too wet. If you see pods permanently clustered at the dry end, you are over-misting; if they are all piled at the damp end, mist more. Our humidity control guide covers measuring and adjusting properly.
8. Do isopods need light?
No — and direct light can harm them. Isopods are nocturnal and prefer dark, humid conditions; sunlight can overheat a plastic tub shockingly fast. A dim room or a shaded shelf is ideal. The honest version: your colony does not need a grow light or UV setup. If the enclosure is inside a bioactive vivarium with a plant light, that is fine, but give the pods a dark hide (cork bark, leaf litter layer) to retreat to during the day.
9. How deep should the substrate be?
For most beginner species, 5–8 cm of substrate is the sweet spot — deep enough to hold a moisture gradient and let pods burrow, shallow enough that food waste does not build up in an anaerobic bottom layer. Burrowing species like Cubaris appreciate the deeper end of that range; surface-active species like Porcellionides pruinosus do fine at 5 cm. Do not fill the tub to the brim: you need headroom between the substrate surface and the lid for airflow and feeding. A handy isopod beginner FAQ rule of thumb: substrate depth should be roughly one-quarter of the tub’s total height.
10. Do isopods need a heat mat?
Not for common beginner species. Powder Oranges, Dairy Cows, Zebras, and Powder Blues all do well at normal room temperature (roughly 20–24°C / 68–75°F). Heat mats are where beginners most often cause harm: an unregulated mat on a plastic tub creates a hot spot that can cook a colony overnight. If your room drops below about 18°C in winter, a thermostat-controlled mat on the side of the tub — never underneath — is the safe way. Details in our isopod temperature guide.
11. How do I know if my isopods are doing well?
Look for three signs: (1) pods out foraging on the surface at night, (2) leaf litter visibly being consumed, and (3) tiny white babies (mancae) appearing within a couple of months. Here is the part care sheets skip: isopods hiding all day is normal — they are nocturnal, so daytime stillness is not a warning sign. Real red flags are mass surface activity during the day combined with lethargy, a sour smell from the substrate, or a colony that has not produced a single baby after six months at room temperature.
12. Isopod beginner FAQ: how long until I see babies?
With hardy species like Powder Oranges or Dairy Cows, expect the first tiny mancae 4–8 weeks after setup at room temperature. Slower species take longer — zebra isopods and especially Cubaris can take 3–6 months to establish. If you bought a culture and there is still nothing after six months, something is off: usually temperature too low, substrate too wet or too dry, or too few females. That is why setup gets so much space in this isopod beginner FAQ — most “not breeding” cases trace back to day one. Our breeding basics guide walks through the full timeline.
13. Can I keep different isopod species together?
It is not recommended for beginners. Species have different moisture and diet preferences, and fast breeders like Porcellio laevis will simply outcompete and overrun slower species in a shared tub. Experienced keepers sometimes run carefully managed mixed enclosures, but for your first year, one species per tub keeps every problem diagnosable.
14. Can I keep isopods and springtails together?
Yes — this is one of the genuinely good pairings in the hobby. Springtails eat mold spores, fungus, and micro-debris that isopods ignore, so together they form a much more complete cleanup crew than either alone. Springtails also act as an early-warning system: a springtail population crash usually means your moisture balance is off before the isopods show stress. Full comparison here: springtails vs isopods.
15. Isopod beginner FAQ: what to do about mold
A little white fuzz on a new piece of wood is normal and usually disappears as the enclosure’s microfauna establishes. Do not panic-spray chemicals. The fix is environmental: increase ventilation slightly, remove the moldy food or wood piece, cut back on misting, and make sure you are removing uneaten fresh food within 48 hours. Persistent mold everywhere usually means the substrate is waterlogged — the tub needs drying out, not more springtails. Our mold and mites guide covers the full response.
16. Isopod beginner FAQ: molting vs. dead isopods
This catches every beginner at least once: a molting isopod lies on its back, motionless, and looks convincingly dead. Isopods molt in two halves — back half first, then the front — so you may also see a pod that looks half-shell. The rule: if it is not discolored or foul-smelling, leave it completely alone. Poking a molting isopod can kill it; a dead one can wait. Learn the full difference in our molting vs dying guide before your first molt scare.
17. Do isopods need calcium?
Yes — calcium is non-negotiable. Isopods build their exoskeletons from calcium carbonate, and they need it for every molt and every brood. Without a constant source, you get failed molts and declining reproduction. Keep a piece of cuttlebone or crushed eggshell in the tub at all times; it lasts for months and costs almost nothing. Watch for the deficiency signs — soft, pale shells and incomplete sheds — in our calcium for isopods guide.
18. How do I clean an isopod enclosure?
Less than you think. The hobby’s dirty secret: a healthy isopod enclosure mostly cleans itself, since the pods eat the waste. Your job is spot-cleaning — remove uneaten fresh food within 48 hours, pull out any moldy pieces, and top up leaf litter and substrate as they get consumed. A full substrate replacement is rarely needed and actually resets the colony’s established microfauna; most keepers do a partial refresh once or twice a year at most. In the isopod beginner FAQ spirit: if it isn’t moldy and isn’t rotting, you probably don’t need to touch it.
19. Can isopods escape? How do I stop them?
Healthy isopods do not climb smooth plastic or glass, so a tub with a snug lid is escape-proof for all practical purposes. Escapes happen in three scenarios: a lid left ajar, a tub tipped over, or very small mancae squeezing through coarse ventilation mesh — use fine mesh or small drilled holes instead. Keep the substrate an inch or two below the rim as a final barrier. If pods are constantly trying to leave, treat it as a husbandry signal: the enclosure conditions are wrong and they are voting with their feet.
20. Isopod beginner FAQ: biggest beginner mistakes
To close this isopod beginner FAQ, here are the mistakes to dodge from day one. From watching beginners (and being one): (1) overfeeding fresh food, which feeds mold and mites; (2) misting the entire tub until the substrate is swampy; (3) using pure coco coir as substrate with no leaf litter or wood — it holds water but has zero nutrition; (4) putting a heat mat directly under a plastic tub with no thermostat; (5) disturbing the colony daily to “check on them.” Isopods reward a hands-off keeper. The expanded list is in our common isopod keeping mistakes guide.
Isopod beginner FAQ: quick-start summary
If you take nothing else from this isopod beginner FAQ: start with Powder Oranges, 10–15 pods in a ventilated tub with a moisture gradient, leaf litter plus wood as the dietary foundation, calcium always available, fresh food twice weekly and removed in 48 hours — and then mostly leave them alone. Do that and your first colony will almost certainly thrive.
References
- PostPods — The Beginner’s Guide to Keeping Isopods in the UK (starter species and cost guidance)
- Wikipedia — Woodlouse (isopod taxonomy and biology)
Disclaimer: care needs vary between species — the guidance above covers common beginner species such as Porcellionides pruinosus, Porcellio laevis, and Armadillidium species. Tropical Cubaris and other specialist species may need different conditions.