Why Quarantining New Isopods Matters
New isopod cultures rarely arrive alone. Even a clean-looking starter culture from a reputable breeder can carry grain mites, soil mites, springtail overflows, mold spores, and occasionally unwanted arthropods — and all of them travel in the substrate, leaf litter, and crevices the isopods ride in on. That is why quarantining new isopods matters: one skipped quarantine can turn a single tub of grain mites into every tub in your rack being crawling within a month.
I have learned this the uncomfortable way: mites migrate. A colony you keep on your desk shelf can share pests with a tub three shelves away because you reached into one, then the other, without washing your hands. Quarantine is simply the habit of assuming every new arrival is guilty until proven innocent — and it costs one spare tub.
What Actually Comes In on New Cultures
Before you panic, know that most hitchhikers are nuisances, not disasters. Here is the usual cast:
- Grain mites: tiny, slow-moving, white-to-tan dots that cluster on food, tub walls, and lids. They explode after overfeeding. Stressful to isopods in huge numbers, but not parasitic.
- Soil mites: slightly smaller and darker than grain mites, slow-moving. Harmless decomposers — many keepers welcome them.
- Predatory mites: fast-moving, larger, longer-legged mites, sometimes brown. These can hunt springtails and, rarely, young isopods. A genuine problem.
- Springtails: usually intentional, but a culture can arrive with a population that overwhelms a small setup and then crashes, fouling the substrate.
- Predatory arthropods: rare, but centipedes and pseudoscorpions occasionally hitch in on collected leaf litter. Pseudoscorpions are harmless; centipedes hunt mancae and must go.
- Mold and fungus gnats: spores ride in on damp substrate and food; gnats follow the mold.
Quarantine exists so you discover these on a disposable setup — not in the colony you have been building for a year.
How Long Does Quarantining New Isopods Take?
Four weeks. This is the number most serious keepers settle on, and there is a reason for it: a grain mite completes egg-to-adult in roughly two to three weeks at room temperature. A two-week quarantine can look clean while an entire generation of mite eggs is still hatching. At four weeks, you have watched a full pest generation come and go — if you saw nothing, there is genuinely nothing there.
My opinion: the commonly suggested “one or two weeks” you will see on shopping guides is the overrated shortcut of this hobby. It is long enough to settle shipping stress and too short to prove pest-freedom. Four weeks costs you nothing but a tub and a little patience.
How to Set Up a Quarantine Tub
Your quarantine tub should be cheap, simple, and completely separate from your main collection. You do not need — and should not use — your nice display setup for this.
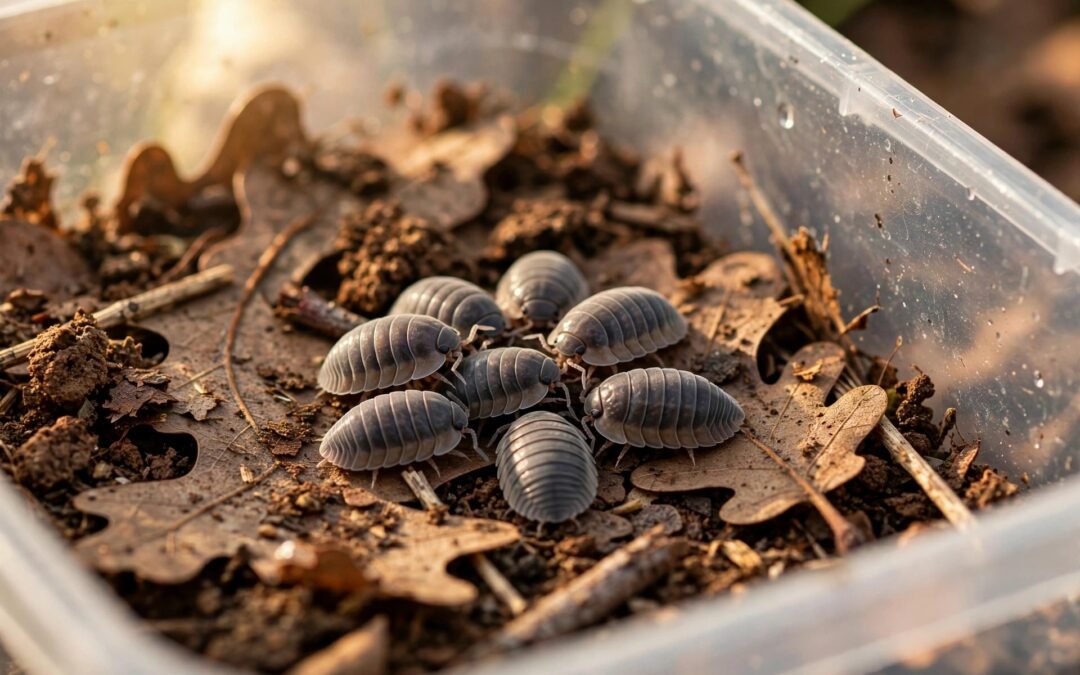
- Use a small dedicated tub (a 6-quart shoebox tub is plenty for most starter cultures). It should have a tight lid with a few small ventilation holes.
- Add fresh substrate — use your standard mix from your best substrate mix for isopods, but keep the layer shallow, about 2–3 cm. Shallow substrate makes it easy to spot anything crawling.
- Include a moisture gradient: one damp corner (sphagnum moss or damp paper towel), the rest dry. Match the species’ needs using your isopod humidity control basics — but err drier than usual during quarantine, since dry conditions discourage mite explosions.
- Add leaf litter and a calcium source — a few oak leaves and a piece of cuttlebone are enough. Feed lightly: quarantine tubs get small food pieces, removed after 48 hours. Uneaten food is a grain-mite buffet.
- Label it with the arrival date. This sounds trivial and is the step everyone skips — then they cannot remember whether it has been two weeks or five.
Keep the quarantine tub on a different shelf from your main colonies, ideally in a different room. If you only have one rack, the top shelf works — just never share tools between tubs.
The 4-Week Checklist for Quarantining New Isopods
Quarantining new isopods is not just waiting — it is structured observation. Each week, spend two minutes doing this:
- Week 1: Check for shipping stress deaths and do your first mite inspection. Look along the tub walls, lid seam, and food pieces with a bright light. Tap the tub gently — mites scatter, isopods freeze or scuttle.
- Week 2: Inspect again, especially under the leaf litter and around any damp moss. Check food: is it molding faster than expected? Note activity levels — a healthy new culture explores; a sick one hides constantly and loses members.
- Week 3: Mite-egg hatch window. This is the week a hidden grain-mite problem reveals itself. Inspect the walls and lid carefully — this is where they cluster.
- Week 4: Final inspection. If all four checks are clean, the culture is cleared for introduction. Look for mancae (tiny white juveniles) as a bonus sign of a settling colony.
Red Flags: What to Watch For
Not everything you see in quarantine is a reason to panic. Here is how to read what you find:
- Slow white dots clustering on food or lid: grain mites. Reduce moisture, stop grain-based foods, remove uneaten food after 24 hours, and add springtails. Bait them out with a slice of cucumber: when it is covered, lift it out, mites and all, and repeat.
- Slow dark dots in the substrate: almost certainly harmless soil mites. Observe, do nothing.
- Fast-moving mites with long legs: likely predatory. Do not merge this culture — restart it (see below).
- White fuzzy patches spreading across substrate: mold outbreak. Cut back food, improve airflow, remove affected litter.
- Ongoing deaths with no visible pests: check ventilation and moisture first — quarantine tubs kept too wet go anaerobic fast. If conditions are right and deaths continue, do not merge: contact the seller and keep the culture isolated.
- Centipedes or other predators: remove by hand. If mancae are being hunted, restart the culture with fresh substrate.
When to Treat vs. When to Restart
This is where I see beginners waste weeks: they try to “treat” a culture that should have been restarted on day one. The rule is simple.
Treat when the problem is grain mites or mold — both are environmental. Dry the tub slightly, remove food aggressively, bait mites out with cucumber slices, and the population collapses within a week or two. The isopods are fine.
Restart when the problem is predatory mites or persistent predators. Pick the isopods out one by one into a fresh tub with entirely new substrate, leaf litter, and hides. Bake or boil any decor you want to reuse, scrub the old tub with vinegar, and throw the old substrate away. Never try to rescue a culture that is being actively hunted — you will lose more isopods fighting it than starting clean.
Restarting feels like admitting failure. It is not — it is the experienced move. The entire point of quarantine is that a restart costs you one tub, not your collection.
Introducing Cleared Cultures to Your Main Colony
After four clean weeks, you can merge the newcomers into their permanent home. There is no need for a slow acclimation ritual — but do it deliberately:
- Set up the permanent enclosure fresh (see your isopod enclosure setup guide) and match it to the right enclosure size for the colony.
- Move the isopods over by hand or with a soft brush — do not dump the quarantine substrate into the new tub. Leave the old substrate (and any eggs you cannot see) behind.
- Old-timers and newcomers of the same species mix without drama. Keep the breeding basics in mind: give a merged colony a few weeks of quiet before judging whether it is thriving.
Quarantine Hygiene Rules That Actually Matter
A quarantine tub only works if it is genuinely separate. Three rules:
- Work your established colonies first, quarantine last. Always. This one habit prevents most cross-contamination.
- Separate tools. A second pair of tongs, a second spray bottle, a second brush — quarantine equipment never touches the main collection.
- Wash your hands between tubs. Grain mites ride on fingers and sleeves. This is the vector nobody believes until it happens to them.
Is quarantining new isopods from a trusted breeder overkill? No — and this is the myth worth killing. Good breeders have mites too; grain mites are a fact of the hobby, not a sign of a bad seller. The best breeders will actually respect you more for quarantining.
FAQ: Quarantining New Isopods
Does Quarantining New Isopods Apply to Trusted Breeders?
Yes. Pests do not care about reputations, and even excellent breeders ship grain mites, soil mites, and mold spores in substrate. Quarantine protects your existing colonies — which is where the real value of your collection lives.
Can I quarantine in the tub the isopods shipped in?
Temporarily, yes, but move them to a proper quarantine tub within a day or two. Shipping containers are cramped, the substrate is exhausted, and you cannot inspect anything properly in them.
What if my quarantine tub is in the same room as my colonies?
That is fine as long as the tub has a tight lid and you follow the hygiene rules: established colonies first, separate tools, wash hands. Different rooms are ideal, different shelves are good, same shelf with strict hygiene is acceptable.
Should I quarantine springtails and plants too?
Springtail cultures rarely need it, but new plants and collected leaf litter deserve a look-over — rinse plants, and bake collected litter at low heat before it goes anywhere near your colonies.
References
- Smug Bug — Mites in Isopod Setups (grain mite vs. soil mite identification, baiting-out method)
- Arachnoboards — Mites in Isopod Culture thread (keeper discussion on mite types and sieve/restart approaches)
While quarantining new isopods, remember that species responses vary — always observe how your particular culture behaves and adjust conditions accordingly. New arrivals sometimes need a few extra days of quiet before they settle into normal feeding patterns.