Learning how to clean an isopod enclosure is mostly about learning how little cleaning these animals actually need. Isopods are detritivores: they eat decaying leaves, rotting wood, and their own waste, so a healthy colony does a large part of the housekeeping itself. Your job is not to keep the tub spotless. It is to remove the few things the colony cannot handle — uneaten fresh food, moldy scraps, and the occasional foul corner — while leaving the living substrate, the microfauna, and the isopods themselves undisturbed. Get that balance right and a colony can run for a year or more without ever needing a full teardown.
This guide explains how to clean an isopod enclosure the safe way: a simple schedule, a spot-cleaning routine, and a step-by-step method for the rare occasions when a partial refresh or a full deep clean is genuinely needed.
How Often Should You Clean an Isopod Enclosure?
Forget the calendar-based cleaning advice written for hamsters and reptiles. Isopod enclosures run on a tiered schedule, where most tasks are quick and only the biggest job is rare:
| Task | How often | What it involves |
|---|---|---|
| Remove uneaten fresh food | Every 24–48 hours | Lift out leftover vegetables, fruit, and protein before they mold |
| Spot-clean and top up | Weekly | Remove moldy bits, add leaf litter, check the moisture gradient |
| Glass and lid wipe | Monthly | Wipe condensation and grime with plain water |
| Partial substrate refresh | Every 6–12 months | Replace the most worn third of the substrate, keep the rest |
| Full deep clean | Rarely — only when needed | Empty, wash, and rebuild the enclosure after a crash or contamination |
Notice what is missing from that table: there is no weekly substrate change and no monthly full clean. That is the first lesson in how to clean an isopod enclosure — restraint is a skill, not laziness. A colony that is cleaned that aggressively never settles. The microbial community in the substrate — the fungi and bacteria the isopods actually graze on — takes weeks to establish, and every full clean resets it to zero. If your tub smells earthy, like a forest floor after rain, it is working. If it smells sour or like ammonia, something needs attention, and the fix is usually airflow or overfeeding, not a scrub-down.
How to Spot-Clean an Isopod Enclosure Each Week
Spot-cleaning is the core skill, and it takes about five minutes. Work in daylight or with a bright lamp so you can see the tiny white mancae (baby isopods) that hide under leaves — the whole point of being gentle is not scooping them out by accident.
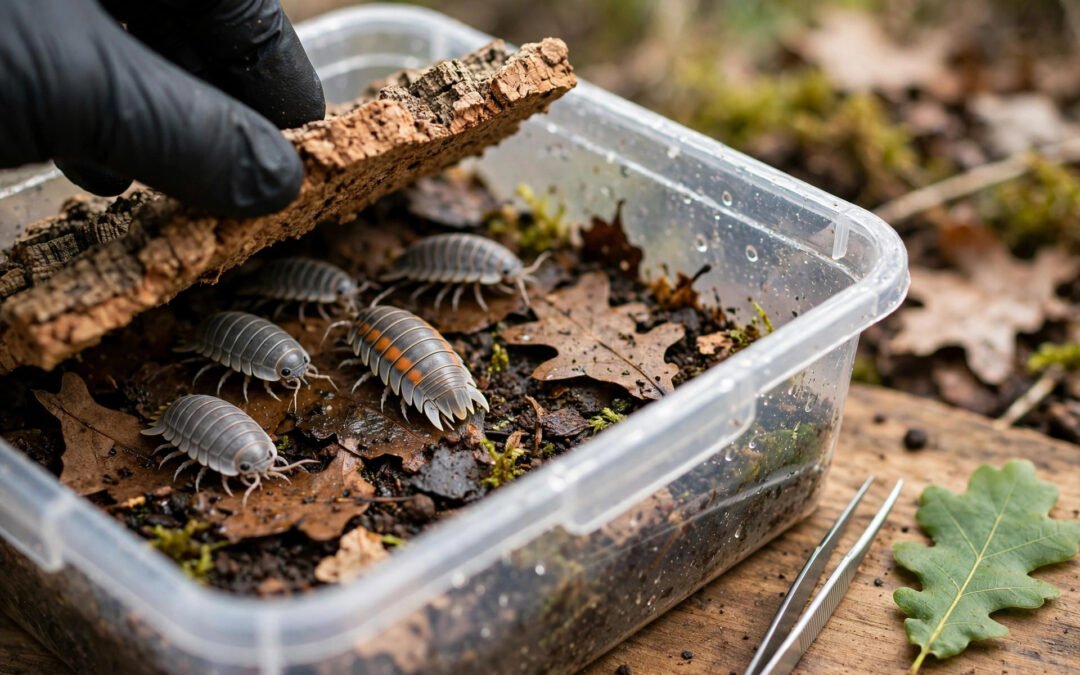
- Lift the hides, don’t dig. Pick up cork bark and wood pieces one at a time and set them aside. Most of the colony will be underneath, so move slowly and keep each hide over the tub while you look at it.
- Remove uneaten fresh food. Use soft tweezers or a spoon to lift out any vegetables, fruit, or protein that has gone soft, slimy, or moldy. Fresh food should never sit longer than 48 hours; in a warm room, 24 hours is safer. For timing by food type, see our guide to feeding vegetables to isopods.
- Pull out moldy litter and wood. A leaf with a patch of white fuzz goes in the bin. Do not panic about mold in general — a little white mold on fresh food is normal and springtails eat it — but remove the piece rather than letting it spread.
- Top up what the colony has eaten. Add a fresh handful of dried leaves and a chunk of rotting wood if the old ones have been skeletonized. Leaf litter is food as much as it is bedding, so a thinning litter layer means the colony is hungry, not dirty. Our best leaf litter for isopods guide ranks the types worth using.
- Check the moisture gradient. Press a finger into the substrate on the moist side and the dry side. The moist side should feel like a wrung-out sponge, the dry side barely damp. Mist only the moist side if it has dried out; never soak the whole tub to “freshen” it. Our isopod humidity control guide explains how to measure this properly.
- Put everything back and leave the colony alone. Replace the hides in roughly the same spots and close the lid. The less you rearrange, the faster the isopods settle.
What Cleaning Products Are Safe for an Isopod Enclosure?
Short answer: plain water, and almost nothing else. Isopods breathe through modified gills and absorb moisture through their undersides, so chemical residues that would be harmless to a reptile can be lethal to them.
- Safe: plain dechlorinated or spring water for wiping; a diluted white-vinegar rinse (one part vinegar to ten parts water) for a tub that is being fully emptied, followed by a thorough rinse with plain water and complete air-drying.
- Never use: dish soap, bleach, antibacterial sprays, glass cleaner, or “reptile-safe” disinfectants inside an occupied enclosure. Residues linger in plastic scratches and porous cork bark long after rinsing, and you cannot rinse a colony.
- For decor: bake cork bark and wood at a low oven temperature or boil it if you want to reuse pieces from a crashed tub. Scrub with water only — no soap, ever.
Here is an honest opinion: vinegar is overrated as an isopod cleaner. Keepers recommend it because it feels like doing something, but for routine cleaning it adds nothing that water and a paper towel do not already do, and a poorly rinsed vinegar film can irritate the colony. Save it for the rare full rebuild, and rinse twice.
How to Do a Partial Substrate Refresh
After six to twelve months, part of the substrate will be spent: compacted, dark, and mostly frass (isopod droppings) rather than soil structure. Frass itself is not dirty — it is fertilizer, and plants and springtails thrive on it — but when a section has lost all structure and stays soggy, it is time for a partial refresh. Never replace all of it at once.
- Pick the worst third. Usually the moist side, where food was offered and waste concentrated. Leave the dry side and the area under the main hides untouched — that is where the mancae and the established microfauna live.
- Scoop gently. Remove the tired substrate a spoonful at a time, checking each scoop for tiny isopods before it goes in the bin. A white tray helps: tip each scoop onto it, pick out any stragglers, then discard.
- Replace with pre-moistened mix. Add fresh substrate matched to your original recipe — see our best substrate mix for isopods — moistened to the same wrung-out-sponge feel, not soaking wet.
- Top with fresh leaf litter. A new litter layer on top of the refreshed section gives the colony immediate food and cover while the new substrate settles.
- Leave it alone for a week. No more digging, no rearranging. The colony will recolonize the fresh section on its own.
The “replace all substrate every few months” advice you will find in some pet-product listings is the single most overrated cleaning rule in the hobby. It sells substrate, and it sets colonies back months. Partial beats total, every time.
How to Deep-Clean an Isopod Enclosure Without Losing Isopods
A full deep clean is justified only in a few situations: a mite explosion that will not respond to drying and baiting, a contaminated substrate (pesticide exposure, spilled chemicals), or a crash where most of the colony has died and the tub smells foul. If none of those apply, do a partial refresh instead. When a deep clean is genuinely needed, work methodically:
- Prepare the new setup first. Have the clean tub, fresh substrate, leaf litter, hides, and calcium source ready before you disturb the old one. A colony sitting in a bare holding container for hours is a colony under stress. Our isopod enclosure setup guide covers the full build order.
- Move the hides first. Lift each hide over a white tray and tap it gently — isopods clinging underneath drop onto the tray, where you can see and transfer them. Check bark crevices twice; mancae are barely 2 mm long and easy to miss.
- Scoop the substrate in layers. Work top to bottom, tray-checking each scoop. Expect to find isopods at every depth, not just on the surface.
- Transfer, don’t dump. Move isopods by hand or with a soft brush into the new enclosure. Never tip old substrate into the new tub — that carries the very problem you are cleaning out.
- Wash the old tub with water only. Scrub, rinse, and air-dry completely. If contamination is suspected, use the diluted vinegar rinse described above, then rinse twice and dry fully before reuse.
- Quarantine the survivors if mites or disease were the cause. Keep the rebuilt colony separate from your other tubs for a few weeks and watch for recurrence. Our quarantining new isopods guide explains the same isolation logic.
One timing rule matters more than any other: never deep-clean during a heavy molting period. Isopods that are mid-molt are soft, pale, and immobile, and they hide rather than flee. If half the colony looks pale and still, wait a week. The tub will survive; a molt interrupted may not. Learn the difference between a molting isopod and a dying one in our isopod molting vs dying guide.
Cleaning a Bioactive Display Tank vs a Breeding Tub
The rules above are written for the standard breeding tub — a plastic container whose whole purpose is the colony. A planted bioactive display tank, where isopods are the cleanup crew for a reptile or amphibian, plays by different rules:
- Display tanks almost never get deep-cleaned. A well-built bioactive tank can run for years with only glass wiping, plant trimming, and litter top-ups. The plants consume the frass, the springtails handle mold, and the system balances itself.
- Breeding tubs get partial refreshes. Without plants to recycle waste, the substrate wears out faster, so the 6–12 month partial refresh applies here, not to display tanks.
- Never sterilize a display tank. Stripping a bioactive tank back to bare glass destroys the microbial community the whole system depends on. If a display tank smells wrong, fix the drainage and airflow first — the substrate is usually the symptom, not the cause.
Mold, Mites, and Smells: When Cleaning Is Not the Answer
Beginners often reach for the cleaning bucket when the real problem is husbandry. Use this quick diagnosis before you dismantle anything:
- White fuzz on fresh food: normal. Remove the food, add springtails, and feed less next time.
- Mold spreading across the substrate: too wet, not enough airflow. Dry the tub slightly, improve ventilation, and remove the worst patches. See our mold and mites guide for the full protocol.
- Tiny white mites swarming food: grain mites, driven by overfeeding. Remove food aggressively for a week and let the tub dry a little — the population collapses on its own.
- Sour or ammonia smell: rotting food buried in soggy substrate, or a colony crash. Find and remove the source, improve drainage, and only rebuild if the substrate itself is foul throughout.
- Colony shrinking despite a clean tub: cleaning is not the fix. Check temperature, moisture, protein, and calcium — a colony that has stopped breeding usually has a husbandry cause, covered in our colony not breeding checklist.
Mistakes to Avoid When You Clean an Isopod Enclosure
- Overcleaning. The number one beginner mistake. A sterile-looking tub is a dead ecosystem. If it is not moldy and not rotting, leave it alone.
- Scooping out frass. Frass looks like dirt, so beginners remove it. It is actually broken-down organic matter that feeds springtails, plants, and the substrate food web. Leave it unless a section has turned to structureless sludge.
- Using soap “just for the tub.” Residue survives rinsing, especially in scratched plastic. Water only, every time, for anything that will house isopods again.
- Cleaning a brand-new colony. A starter culture needs at least a month of total peace to establish. Do not open it for cleaning in the first few weeks beyond removing obviously moldy food.
- Chasing a perfect smell. A healthy isopod tub smells like damp earth. That is not a problem to solve — it is the sign of a working colony.
Frequently Asked Questions
Do I need to clean isopod poop out of the enclosure?
No. Isopod frass is harmless and useful — springtails and soil microbes break it down further, and it feeds plants in bioactive setups. Only remove substrate when a section has lost all structure and stays soggy, and then replace just that section.
Can I use tap water to clean an isopod enclosure?
For wiping an empty tub, yes, but let it dry fully. For misting or moistening substrate, dechlorinated or spring water is safer, since chlorine and chloramine can harm the microfauna the colony depends on.
How do I clean an isopod enclosure without losing baby isopods?
Work over a white tray, move hides one at a time, and check every scoop of substrate before discarding it — that is how to clean an isopod enclosure without losing the babies. Mancae are tiny and pale, so bright light and slow movements matter more than any special tool.
Is it safe to clean an isopod enclosure while females are carrying eggs?
Spot-cleaning is fine — just lift hides gently and put them back. Avoid a partial refresh or deep clean while many females are gravid, since the disturbance and the loss of familiar substrate can stress the colony and scatter mancae.
References
- Petco — Roly-Poly (Isopod) Care Sheet, habitat cleaning guidance
- ReptileKnowledge — Do Isopods Clean Terrariums?
- GC Shop — How to Maintain and Upgrade a Mature Isopod Terrarium
Note: if your colony suddenly stops thriving after a clean, the cleaning itself may be the cause. Give the tub two quiet weeks before changing anything else — most colonies recover once the keeper stops intervening.